Soptify 的教程,直接照着做就行了:
https://developer.spotify.com/technologies/spotify-ios-sdk/tutorial/
检测当前跑者摆臂频率:
这个是自己写的,逻辑上分为两个部分:
维护摆臂时间记录的数组:当垂直方向y的加速度绝对值大于0.8且距离上次有效的摆臂超过一定时间间隔时,记为摆臂有效,把当前时间存入一个NSMutableArray中。当这个NSMutableArray中的元素个数超过20时,删掉其中 index=0 的元素。
当前摆臂频率:根据上面提到的数组,取出第一个和最后一个元素,算时间间隔 interval1。再计算当前时刻和数组中最后一个元素的时间间隔 interval2。给出速度的定义为:每秒钟摆臂的次数。那么,这个速度的值就与 interval1 和 interval2 成正比。这个速度越大,说明摆臂的频率越低。
现在有一个问题就是,如果使用者一直竖着拿着手机,即使没有动,也会识别为摆臂频率很高。
GitHub链接:https://github.com/1992chenlu/TempoDemo
2015年7月31日星期五
[笔记] 使用 CLLocationManager 实现 RunKeeper
这篇难度系数极低,主要关于如何维护使用者已经跑出的距离(distance 变量)……
算两个CLLocation之间的距离本来想用一个地球半径相关复杂公式算的,但是既然有现成的,还是省省吧……
用这个初始化CLLocationManager:
用这段更新已经跑出的距离:
注意:在使用CLLocationManager时,需要在Supporting File 的 info.plist 中加这样两行,否则没有办法用(调了好久才发现,还没搞清楚为啥)。
代码链接:https://gist.github.com/1992chenlu/2ec71e9dc5d3d6588160
Reference: http://www.raywenderlich.com/73984/make-app-like-runkeeper-part-1
算两个CLLocation之间的距离本来想用一个地球半径相关复杂公式算的,但是既然有现成的,还是省省吧……
用这个初始化CLLocationManager:
- (void)startLocationUpdates
{
    // Create the location manager if this object does not
    // already have one.
    if (self.locationManager == nil) {
        self.locationManager = [[CLLocationManager alloc] init];
    }

    self.locationManager.delegate = self;
    self.locationManager.desiredAccuracy = kCLLocationAccuracyBest;
    self.locationManager.activityType = CLActivityTypeFitness;

    // Movement threshold for new events.
    self.locationManager.distanceFilter = 10; // meters

    [self.locationManager startUpdatingLocation];
}
用这段更新已经跑出的距离:
- (void)locationManager:(CLLocationManager *)manager
     didUpdateLocations:(NSArray *)locations
{
    for (CLLocation *newLocation in locations) {
        if (newLocation.horizontalAccuracy < 20) {

            // update distance
            if (self.locations.count > 0) {
                self.distance += [newLocation distanceFromLocation:self.locations.lastObject];
            }

            [self.locations addObject:newLocation];
        }
    }
}
注意:在使用CLLocationManager时,需要在Supporting File 的 info.plist 中加这样两行,否则没有办法用(调了好久才发现,还没搞清楚为啥)。
<!-- for requestAlwaysAuthorization -->
    <key>NSLocationAlwaysUsageDescription</key>
    <string>Explain for what are you using the user location</string>
    <!-- for requestWhenInUseAuthorization -->
    <key>NSLocationWhenInUseUsageDescription</key>
    <string>Explain for what are you using the user location</string>
代码链接:https://gist.github.com/1992chenlu/2ec71e9dc5d3d6588160
Reference: http://www.raywenderlich.com/73984/make-app-like-runkeeper-part-1
[笔记] 关于 NSThread
这回的作业需要一直根据x,y,z三个方向的加速度维护一个变量,另外有个线程每隔一秒访问一次这个变量,根据变量的值判断输出音乐的频率。于是就先写了下面这么个程序练手。
下面这个东西干了这么个事情:分出两个Thread,都执行对value值+1,并打印的操作。
吐槽:笔者写似乎是个线程不安全的典型,请勿参考。
代码链接:https://gist.github.com/1992chenlu/41b3adfb10d01ac36dda
Reference:
http://www.raywenderlich.com/60749/grand-central-dispatch-in-depth-part-1(这一篇很好,有时间应该细读)
http://www.cnblogs.com/likwo/archive/2011/11/01/2232309.html
http://sodecon.blogspot.com/2012/08/ios-multithreading-thread-safety-in-ios.html
http://www.libaocai.com/network/ios/2014/12/30/608
http://blog.csdn.net/zhangao0086/article/details/38904923(这篇关于GCD,还没搞明白T_T)
下面这个东西干了这么个事情:分出两个Thread,都执行对value值+1,并打印的操作。
吐槽:笔者写似乎是个线程不安全的典型,请勿参考。
//
//  ViewController.m
//  MTTest
//
//  Created by 鲁辰 on 7/29/15.
//  Copyright (c) 2015 ChenLu. All rights reserved.
//

#import "ViewController.h"

@interface ViewController ()

@property (nonatomic, assign) NSUInteger value;

@end

@implementation ViewController
@synthesize value;

- (void)viewDidLoad {
    [super viewDidLoad];
    // Do any additional setup after loading the view, typically from a nib.

    //NSThread
    [NSThread detachNewThreadSelector:@selector(run) toTarget:self withObject:nil];

    NSThread* myThread = [[NSThread alloc] initWithTarget:self
                                                   selector:@selector(run)
                                                     object:nil];
    [myThread start];

}

- (void)didReceiveMemoryWarning {
    [super didReceiveMemoryWarning];
    // Dispose of any resources that can be recreated.
}

- (void)run {
    while (YES) {
        @synchronized(self) {
            value++;
        }
        NSThread *current = [NSThread currentThread];
        NSLog(@"Value: %lu, Thread: %@", (unsigned long)value, current);
        sleep(1);
    }
}

@end
代码链接:https://gist.github.com/1992chenlu/41b3adfb10d01ac36dda
Reference:
http://www.raywenderlich.com/60749/grand-central-dispatch-in-depth-part-1(这一篇很好,有时间应该细读)
http://www.cnblogs.com/likwo/archive/2011/11/01/2232309.html
http://sodecon.blogspot.com/2012/08/ios-multithreading-thread-safety-in-ios.html
http://www.libaocai.com/network/ios/2014/12/30/608
http://blog.csdn.net/zhangao0086/article/details/38904923(这篇关于GCD,还没搞明白T_T)
2015年7月13日星期一
[笔记][08723] TwitterDemo
TwitterMediaDemo(包括推图片、视频的功能):
https://github.com/1992chenlu/TwitterMediaDemo
包括Timeline的Demo的GitHub链接:
https://github.com/1992chenlu/CLTwitterDemo
(这个要配置好Fabric才可以跑)
https://github.com/liu044100/SocialVideoHelper
调用uploadTwitterVideo这个函数即可。
reference: http://docs.fabric.io/ios/twitter/show-timelines.html
(GitHub使用的问题终于解决了,原来是每次commit之前都没有用'git add .',竟然拖了这么久才发现,这脑残程度也是给自己跪了……ref: http://blog.csdn.net/jackystudio/article/details/12249419)
https://github.com/1992chenlu/TwitterMediaDemo
包括Timeline的Demo的GitHub链接:
https://github.com/1992chenlu/CLTwitterDemo
(这个要配置好Fabric才可以跑)
1. Post Tweet with Photo
- (IBAction)tweetImage:(id)sender {
    if ([SLComposeViewController isAvailableForServiceType:SLServiceTypeTwitter])
    {

        SLComposeViewController *tweetSheet = [SLComposeViewController composeViewControllerForServiceType:SLServiceTypeTwitter];
        [tweetSheet setInitialText:@"#とある科学の超電磁砲# Twitter Demo Testing! Hahaha! "];

        //Add image
        [tweetSheet addImage:[UIImage imageNamed:@"mikoto.jpg"]];

        //Add URL
        [tweetSheet addURL:[NSURL URLWithString:@"http://codechen.blogspot.com/"]];

        [self presentViewController:tweetSheet animated:YES completion:nil];
    }
    else
    {
        NSLog(@"Failed");
    }
}
2. Post Tweet with Video
用到一个别人制作的SocialVideoHelper,GitHub链接:https://github.com/liu044100/SocialVideoHelper
调用uploadTwitterVideo这个函数即可。
- (IBAction)tweetVideo:(id)sender {
    if (_video == nil) {
        NSLog(@"No Video to upload!");
        return;
    }

    NSData *data = [NSData  dataWithContentsOfURL:_video];

    ACAccountStore *accountStore = [[ACAccountStore alloc] init];
    ACAccountType *accountType = [accountStore accountTypeWithAccountTypeIdentifier:ACAccountTypeIdentifierTwitter];
    [accountStore requestAccessToAccountsWithType:accountType options:NULL completion:^(BOOL granted, NSError *error) {
        if(granted) {
            NSArray *accountsArray = [accountStore accountsWithAccountType:accountType];
            if ([accountsArray count] > 0) {
                ACAccount *account = accountsArray[0];

                [SocialVideoHelper uploadTwitterVideo:data account:account withCompletion:^{
                    NSLog(@"%@", @"Video Uploaded! Hahaha!");
                }];
            }
        }
    }];
}
3. Show Timeline
需要先配置一下Fabric,然后粘下面的代码。reference: http://docs.fabric.io/ios/twitter/show-timelines.html
// Objective-C

// FABUserTimelineViewController.h
#import <UIKit/UIKit.h>
#import <TwitterKit/TwitterKit.h>

@interface FABUserTimelineViewController : TWTRTimelineViewController
@end

// FABUserTimelineViewController.m
#import "FABUserTimelineViewController.h"
#import <TwitterKit/TwitterKit.h>
@implementation FABUserTimelineViewController

- (void)viewDidLoad {
  [super viewDidLoad];

  [[Twitter sharedInstance] logInGuestWithCompletion:^(TWTRGuestSession *guestSession, NSError *error) {
    if (guestSession) {
      TWTRAPIClient *APIClient = [[Twitter sharedInstance] APIClient];
      TWTRUserTimelineDataSource *userTimelineDataSource = [[TWTRUserTimelineDataSource alloc] initWithScreenName:@"wanquribao" APIClient:APIClient];
      self.dataSource = userTimelineDataSource;
    } else {
      NSLog(@"error: %@", [error localizedDescription]);
    }
  }];
}

@end
4.问题
尝试使用REST API上传图片,当地址在本地目录下时,没有问题,可以先get到这个图片对应的UIImage,转成NSData上传,但是,如果是相机拍摄的,作为参数传到同样的上传照片的函数中就无法,转成NSData就会得到nil,无法正常上传。(GitHub使用的问题终于解决了,原来是每次commit之前都没有用'git add .',竟然拖了这么久才发现,这脑残程度也是给自己跪了……ref: http://blog.csdn.net/jackystudio/article/details/12249419)
广告:亲,觉得demo做的好的话,请star一下哦!觉得做的不好,请在评论里喷它!
2015年7月5日星期日
[吐槽][08723] About Sophie's HW3
此处笔者把苏菲的HW3撕成了几块,做成了demo,每块在对应的demo中都能找到小于100 行的实现代码,抄起来很方便,欢迎抓取。
To do:
(1)Use AssetLibrary to read assets from CameraRoll:[笔记][08723] 使用 AssetLibrary 得到 Camera Roll 中的 Assets
(2)Use TableViewController to show asset information in a list:[笔记][08723] 使用 AssetLibrary 得到 Camera Roll 中的 Assets
(3)Forward to a new View after tapping one cell in table view:[笔记][08723] Table View Segue to Detail View Controller (Segue)
关于切换 View 的时候 asset 数据怎样传递的问题,请见 Apple 官方 Demo,MyImagePicker 的 PageViewControllerData类 的使用。

[笔记][08723] 关于拍摄视频和播放视频(MPMoviePlayerController、UIImagePickerController)
最后给鹅屋的『光るなら』打个广告,做这个作业的时间里,笔者把它单曲循环了上百遍,依旧好听,最喜欢里面那个弹吉他的妹子了。可以说『四月は君の嘘』创造了动漫OP和ED的新高度。
1. Universal Player
1.1 List of Camera Roll
To do:
(1)Use AssetLibrary to read assets from CameraRoll:[笔记][08723] 使用 AssetLibrary 得到 Camera Roll 中的 Assets
(2)Use TableViewController to show asset information in a list:[笔记][08723] 使用 AssetLibrary 得到 Camera Roll 中的 Assets
(3)Forward to a new View after tapping one cell in table view:[笔记][08723] Table View Segue to Detail View Controller (Segue)
关于切换 View 的时候 asset 数据怎样传递的问题,请见 Apple 官方 Demo,MyImagePicker 的 PageViewControllerData类 的使用。
1.2 Photo Viewer
[[笔记][08723] 使用 UIImagePickerController 拍照并保存到 Camera Roll1.3 Video Player

2. Take Photo/Video
2.1 Take Photo
[[笔记][08723] 使用 UIImagePickerController 拍照并保存到 Camera Roll2.2 Capture Video
[笔记][08723] 关于拍摄视频和播放视频(MPMoviePlayerController、UIImagePickerController)3. 吐槽(TuCao)
这么个作业做完收获还是很大的,只不过没有什么成就感,大部分时间浪费在找可以用来参考的代码上(请见博文 [笔记][08723] Mobile HW3 References,是已经去噪过后的版本),也是因此总结了例程,供以后参考。虽然苏菲给了例子源代码,但是对于笔者这种笨人来说,在她那一坨一坨的代码里面找可以复用的代码片段比在草堆里找针还要困难。吐槽完毕。最后给鹅屋的『光るなら』打个广告,做这个作业的时间里,笔者把它单曲循环了上百遍,依旧好听,最喜欢里面那个弹吉他的妹子了。可以说『四月は君の嘘』创造了动漫OP和ED的新高度。
[笔记][08723] Table View Segue to Detail View Controller (Segue)
Youtube视频讲解全过程:https://www.youtube.com/watch?v=N7nM0S_IJ6g
步骤(在AssetLibrary Demo的那篇笔记的基础上做):
1. 在storyboard里,添加一个ViewController,再添加一个segue指向这个ViewController

2. 给刚刚添加的 segue 加上ID,“showPhoto”。

Attention:The identifier of cell should match(此处在Main.storyboard中应选中Table View 里面的cell)。

3. 新建一个 ViewController 的 Cocoa Class 名为 MyViewController。并把刚刚Storyboard里面添加的那个 ViewController 的 custom class 设置设为 MyViewController。


4. 代码
在 MyTableViewController.m 中添加:
5. 结果:在点击 TableView 的一个 Cell 之后跳转到新的页面。NSLog有输出那个 Cell 的index,如图。

步骤(在AssetLibrary Demo的那篇笔记的基础上做):
1. 在storyboard里,添加一个ViewController,再添加一个segue指向这个ViewController

2. 给刚刚添加的 segue 加上ID,“showPhoto”。

Attention:The identifier of cell should match(此处在Main.storyboard中应选中Table View 里面的cell)。

3. 新建一个 ViewController 的 Cocoa Class 名为 MyViewController。并把刚刚Storyboard里面添加的那个 ViewController 的 custom class 设置设为 MyViewController。


4. 代码
//
//  MyViewController.h
//  AssetLibraryDemo
//
//  Created by 鲁辰 on 7/6/15.
//  Copyright (c) 2015 ChenLu. All rights reserved.
//

#import <UIKit/UIKit.h>

@interface MyViewController : UIViewController

@property(nonatomic) NSInteger index;

@end
//
//  MyViewController.m
//  AssetLibraryDemo
//
//  Created by 鲁辰 on 7/6/15.
//  Copyright (c) 2015 ChenLu. All rights reserved.
//

#import "MyViewController.h"

@implementation MyViewController

- (void) viewDidLoad {
    [super viewDidLoad];
    NSLog(@"From Table Index: %d", _index);
}

@end
在 MyTableViewController.m 中添加:
- (void)prepareForSegue:(UIStoryboardSegue *)segue sender:(id)sender {

    if ([[segue identifier] isEqualToString:@"showPhoto"]) {

        // start new view at the appropriate cell index
        NSIndexPath *selectedCellIndex = [self.tableView indexPathForSelectedRow];

        MyViewController *myViewController = [segue destinationViewController];

        myViewController.index = selectedCellIndex.row;

    }
}
5. 结果:在点击 TableView 的一个 Cell 之后跳转到新的页面。NSLog有输出那个 Cell 的index,如图。

[笔记][08723] 关于拍摄视频和播放视频(MPMoviePlayerController、UIImagePickerController)
代码讲解链接:http://www.appcoda.com/video-recording-playback-ios-programming/

2. 视频播放 ,自带start、pause、progress bar (MPMoviePlayerController)
(注意:这份代码在 iOS8 以下的版本不能正常运行)
效果图:

1. 视频拍摄 (UIImagePickerController)
- (IBAction)captureVideo:(id)sender {
    if ([UIImagePickerController isSourceTypeAvailable:UIImagePickerControllerSourceTypeCamera]) {

        UIImagePickerController *picker = [[UIImagePickerController alloc] init];
        picker.delegate = self;
        picker.allowsEditing = YES;
        picker.sourceType = UIImagePickerControllerSourceTypeCamera;
        picker.mediaTypes = [[NSArray alloc] initWithObjects: (NSString *) kUTTypeMovie, nil];

        [self presentViewController:picker animated:YES completion:NULL];
    }
}
2. 视频播放 ,自带start、pause、progress bar (MPMoviePlayerController)
- (void)imagePickerController:(UIImagePickerController *)picker didFinishPickingMediaWithInfo:(NSDictionary *)info {

    self.videoURL = info[UIImagePickerControllerMediaURL];
    [picker dismissViewControllerAnimated:YES completion:NULL];

    self.videoController = [[MPMoviePlayerController alloc] init];

    [self.videoController setContentURL:self.videoURL];
    [self.videoController.view setFrame:CGRectMake (0, 0, self.view.frame.size.width, 460)];
    [self.view addSubview:self.videoController.view];

    [[NSNotificationCenter defaultCenter] addObserver:self
                                             selector:@selector(videoPlayBackDidFinish:)
                                                 name:MPMoviePlayerPlaybackDidFinishNotification
                                               object:self.videoController];
    [self.videoController play];

}
[笔记][08723] 使用 UIImagePickerController 拍照并保存到 Camera Roll
GitHub链接:https://github.com/1992chenlu/CameraDemo

建好一个新的 Single View Application 之后,在 ViewController 中加一个 UIImageView 和一个 button,connect 到 .h 文件中。
1. 关于picker.allowsEditing
这里chosenImage是要保存的UIImage对象。得到它的方法是:
3. 显示刚刚拍到的照片
http://stackoverflow.com/questions/14196012/how-to-force-a-uibutton-to-always-be-on-top
效果图:

建好一个新的 Single View Application 之后,在 ViewController 中加一个 UIImageView 和一个 button,connect 到 .h 文件中。
1. 关于picker.allowsEditing
reference里面的那个例子设置为YES,其结果就是可以截取所拍照片的一部分,对应的UIImage对象是 info[UIImagePickerControllerEditedImage]。
2.关于保存
使用:
UIImageWriteToSavedPhotosAlbum(chosenImage, nil, nil, nil);这里chosenImage是要保存的UIImage对象。得到它的方法是:
UIImage *chosenImage = info[UIImagePickerControllerOriginalImage];3. 显示刚刚拍到的照片
self.imageView.image = chosenImage;4. 关于一个bug
Snapshotting a view that has not been rendered results in an empty snapshot. Ensure your view has been rendered at least once before snapshotting or snapshot after screen updates.
Explanation: http://stackoverflow.com/questions/25884801/ios-8-snapshotting-a-view-that-has-not-been-rendered-results-in-an-empty-snapsho代码:
//
//  ViewController.h
//  CameraDemo
//
//  Created by 鲁辰 on 7/5/15.
//  Copyright (c) 2015 ChenLu. All rights reserved.
//

#import <UIKit/UIKit.h>

@interface ViewController : UIViewController <UIImagePickerControllerDelegate, UINavigationControllerDelegate>

@property (strong, nonatomic) IBOutlet UIImageView *imageView;
- (IBAction)takePhoto:(id)sender;
@property (weak, nonatomic) IBOutlet UIButton *takePhotoButton;

@end
//
//  ViewController.m
//  CameraDemo
//
//  Created by 鲁辰 on 7/5/15.
//  Copyright (c) 2015 ChenLu. All rights reserved.
//

#import "ViewController.h"

@interface ViewController ()

@end

@implementation ViewController

- (void)viewDidLoad {
    [super viewDidLoad];
    // Do any additional setup after loading the view, typically from a nib.

    if (![UIImagePickerController isSourceTypeAvailable:UIImagePickerControllerSourceTypeCamera]) {

        UIAlertView *myAlertView = [[UIAlertView alloc] initWithTitle:@"Error"
                                                              message:@"Device has no camera"
                                                             delegate:nil
                                                    cancelButtonTitle:@"OK"
                                                    otherButtonTitles: nil];

        [myAlertView show];

    }
}

- (void)didReceiveMemoryWarning {
    [super didReceiveMemoryWarning];
    // Dispose of any resources that can be recreated.
}

#pragma mark - Image Picker Controller delegate methods

- (void)imagePickerController:(UIImagePickerController *)picker didFinishPickingMediaWithInfo:(NSDictionary *)info {

    UIImage *chosenImage = info[UIImagePickerControllerOriginalImage];
    self.imageView.image = chosenImage;

    //Save photo to camera roll
    UIImageWriteToSavedPhotosAlbum(chosenImage, nil, nil, nil);

    [picker dismissViewControllerAnimated:YES completion:NULL];

    [self.view bringSubviewToFront:_takePhotoButton];

}

- (void)imagePickerControllerDidCancel:(UIImagePickerController *)picker {

    [picker dismissViewControllerAnimated:YES completion:NULL];

}

- (IBAction)takePhoto:(id)sender {
    UIImagePickerController *picker = [[UIImagePickerController alloc] init];
    picker.delegate = self;
    picker.allowsEditing = NO;
    picker.sourceType = UIImagePickerControllerSourceTypeCamera;

    [self presentViewController:picker animated:YES completion:NULL];
}
@end
Reference:
https://github.com/matthewmorton/Camera_Apphttp://stackoverflow.com/questions/14196012/how-to-force-a-uibutton-to-always-be-on-top
[请勿参考][笔记][08723] AVPlayer
首先,Apple官方有一个很好的AVPlayerDemo:
https://developer.apple.com/library/ios/samplecode/AVPlayerDemo/Introduction/Intro.html
(不过笔者的水平抄不了它,解构太难了)
一段简单的初始化AVPlayer的代码:
作业要求还有Pause、Play、Progress Bar,目前还在探索中。
Sophie给的Hint是骗人的!说什么要用AVFoundation!用AVPlayer的话还需要自己写 progress bar 和 pause/play button。明明用MPMoviePlayerController会简单很多!!
关于MPMoviePlayerController的使用,请见:
http://codechen.blogspot.com/2015/07/08723-mpmovieplayercontrolleruiimagepic.html
https://developer.apple.com/library/ios/samplecode/AVPlayerDemo/Introduction/Intro.html
(不过笔者的水平抄不了它,解构太难了)
一段简单的初始化AVPlayer的代码:
- (void)viewDidLoad {

    [super viewDidLoad];

    NSString *urlString=@"gooseHouse.mp4";

    self.player = [AVPlayer playerWithURL:[NSURL fileURLWithPath:urlString]];

    AVPlayerLayer *layer = [AVPlayerLayer playerLayerWithPlayer:self.player];

    CGSize size = self.view.bounds.size;
    layer.frame = CGRectMake(0, 0, size.width, size.height);
    [layer setVideoGravity:AVLayerVideoGravityResizeAspectFill];

    self.player.actionAtItemEnd = AVPlayerActionAtItemEndNone;

    [self.view.layer addSublayer: layer];

    [self.player play];
}
作业要求还有Pause、Play、Progress Bar,目前还在探索中。
Sophie给的Hint是骗人的!说什么要用AVFoundation!用AVPlayer的话还需要自己写 progress bar 和 pause/play button。明明用MPMoviePlayerController会简单很多!!
关于MPMoviePlayerController的使用,请见:
http://codechen.blogspot.com/2015/07/08723-mpmovieplayercontrolleruiimagepic.html
[笔记][08723] 使用 AssetsLibrary 得到 Camera Roll 中的 Assets
源代码下载:https://github.com/1992chenlu/AssetsLibraryDemo
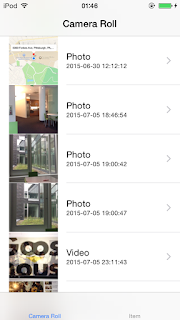
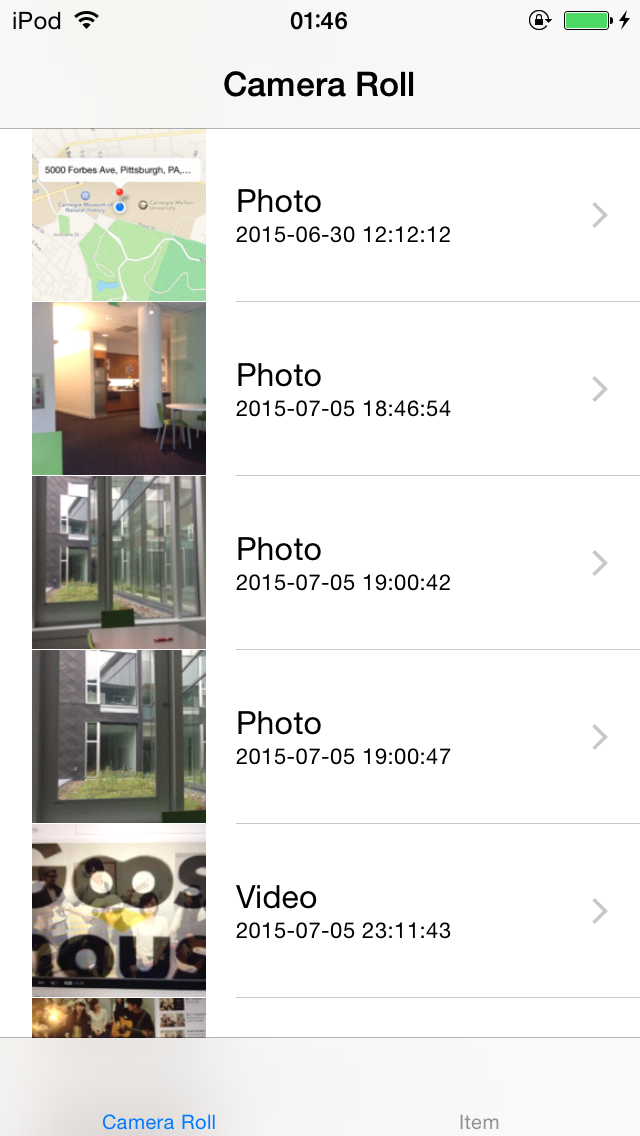
这个demo主要针对作业的第一个要求: showing all the multimedia files from Photo Album in a table view。需要用到 AssetsLibrary 来得到当前 Camera Roll 中所有的Asset,然后显示在 TableView 里面。
(注意:在这个demo里TableView 中显示的是所有的 video,而苏菲的要求是 all the multimedia files,也就是要包括 photos,实现方法见代码注释,友情建议:测试photo显示时,请先清一清自己之前的自拍,泪奔T_T)
另外,最好将 TableViewController 嵌在 Navigation Controller 里面使用(之前 第一版 里面没有这么做,现在补上了),因为后面加segue跳转到下一屏显示video或image的时候,必须要有 Navigation Controller才能实现跳转,只使用 TableViewController 是无法实现页面跳转的。
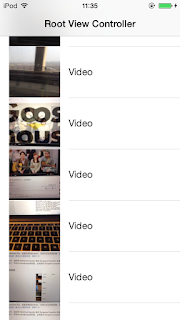
效果图:

步骤:
1. 新建一个工程,删掉 storyboard 中 default 的 ViewController,加入一个NavigationController,并设为 initial view controller。

2. 新建一个 UITableViewController 的 subclass,命名为 MyTableViewController。并将MyTableViewController 设为 Storyboard 中刚刚添加的 Root View Controller 的 Custom Class。

3. 不废话了,码代码。
//
//  MyTableViewController.h
//  AssetLibraryDemo
//
//  Created by 鲁辰 on 7/5/15.
//  Copyright (c) 2015 ChenLu. All rights reserved.
//

#import <UIKit/UIKit.h>
#import <AssetsLibrary/AssetsLibrary.h>
#import <AVFoundation/AVFoundation.h>

@interface MyTableViewController : UITableViewController<UITableViewDataSource, UITableViewDelegate>

@property (nonatomic, strong) ALAssetsLibrary *assetsLibrary;
@property (nonatomic, strong) NSMutableArray *videoTitleArray;
@property (nonatomic, strong) NSMutableArray *videoURLArray;
@property (nonatomic, strong) NSMutableArray *videoImageArray;

@end
//
//  MyTableViewController.m
//  AssetLibraryDemo
//
//  Created by 鲁辰 on 7/5/15.
//  Copyright (c) 2015 ChenLu. All rights reserved.
//

#import "MyTableViewController.h"

@implementation MyTableViewController

- (void)viewDidLoad
{
    [super viewDidLoad];
}

- (void) viewWillAppear:(BOOL)animated  {
    _videoTitleArray = [[NSMutableArray alloc] init];
    _videoURLArray = [[NSMutableArray alloc] init];
    _videoImageArray = [[NSMutableArray alloc] init];
    [self buildAssetsLibrary];
}

- (void)didReceiveMemoryWarning
{
    [super didReceiveMemoryWarning];
    // Dispose of any resources that can be recreated.
}

#pragma mark - Table View Data source
- (NSInteger)tableView:(UITableView *)tableView numberOfRowsInSection:
(NSInteger)section{
    return _videoTitleArray.count;
}

- (UITableViewCell *)tableView:(UITableView *)tableView cellForRowAtIndexPath:
(NSIndexPath *)indexPath{
    static NSString *cellIdentifier = @"cellID";

    UITableViewCell *cell = [tableView dequeueReusableCellWithIdentifier:
                             cellIdentifier];
    if (cell == nil) {
        cell = [[UITableViewCell alloc]initWithStyle:
                UITableViewCellStyleValue1 reuseIdentifier:cellIdentifier];
    }

    NSString *stringForCell;
    stringForCell= [_videoTitleArray objectAtIndex:indexPath.row];
    [cell.textLabel setText:stringForCell];
    cell.imageView.image = [_videoImageArray objectAtIndex:indexPath.row];
    return cell;
}

#pragma mark - Show Video List Methods
- (void)buildAssetsLibrary
{
    _assetsLibrary = [[ALAssetsLibrary alloc] init];
    ALAssetsLibrary *notificationSender = nil;

    NSString *minimumSystemVersion = @"4.1";
    NSString *systemVersion = [[UIDevice currentDevice] systemVersion];
    if ([systemVersion compare:minimumSystemVersion options:NSNumericSearch] != NSOrderedAscending)
        notificationSender = _assetsLibrary;

    [[NSNotificationCenter defaultCenter] addObserver:self selector:@selector(assetsLibraryDidChange:) name:ALAssetsLibraryChangedNotification object:notificationSender];
    [self updateAssetsLibrary];
}

- (void)assetsLibraryDidChange:(NSNotification*)changeNotification
{
    [self updateAssetsLibrary];
}

- (void)updateAssetsLibrary
{
    ALAssetsLibrary *assetLibrary = _assetsLibrary;

    [assetLibrary enumerateGroupsWithTypes:ALAssetsGroupAll usingBlock:^(ALAssetsGroup *group, BOOL *stop)
     {
         if (group)
         {
             [group setAssetsFilter:[ALAssetsFilter allVideos]];
             //Please see: https://developer.apple.com/library/ios/documentation/AssetsLibrary/Reference/ALAssetsFilter_Class/
             //To get all assets (photos and videos), use allAssets as filter.

             [group enumerateAssetsUsingBlock:^(ALAsset *asset, NSUInteger index, BOOL *stop)
              {
                  if (asset)
                  {
                      ALAssetRepresentation *defaultRepresentation = [asset defaultRepresentation];
                      NSString *uti = [defaultRepresentation UTI];
                      NSURL *videoURL = [[asset valueForProperty:ALAssetPropertyURLs] valueForKey:uti];

                      NSString *title = [NSString stringWithFormat:@"%@", NSLocalizedString(@"Video", nil)];
                      [_videoTitleArray addObject:title];
                      [_videoURLArray addObject:videoURL];

                      CGImageRef thumbnailImageRef = [asset thumbnail];
                      UIImage *thumbnail = [UIImage imageWithCGImage:thumbnailImageRef];
                      [_videoImageArray addObject:thumbnail];
                      [self.tableView reloadData];
                  }
              } ];
         }
     }
                              failureBlock:^(NSError *error)
     {
         NSLog(@"error enumerating AssetLibrary groups %@\n", error);
     }];
}

@end
2015年7月3日星期五
[笔记][08723] Mobile HW3 References
Access camera in iOS simulator:
http://stackoverflow.com/questions/25486080/how-to-access-ios-simulator-camera
http://www.raywenderlich.com/13418/how-to-play-record-edit-videos-in-ios
http://stackoverflow.com/questions/17585908/how-can-i-get-the-list-of-all-video-files-from-library-in-ios-sdk
http://stackoverflow.com/questions/18508178/how-do-i-get-only-the-videos-using-alassetslibrary
http://stackoverflow.com/questions/3793109/how-to-play-video-in-iphone-xcode
可以抄的Apple的Demo:
https://developer.apple.com/library/ios/samplecode/MyImagePicker/Introduction/Intro.html
Asset Library get Camera Roll:
http://stackoverflow.com/questions/15570113/alassetslibrary-get-camera-roll
http://stackoverflow.com/questions/12737860/assertion-failure-in-dequeuereusablecellwithidentifierforindexpath
http://stackoverflow.com/questions/22231475/prepareforsegue-method-in-ios7
Table View Subtitle + Detail View Controller on Xcode:
https://www.youtube.com/watch?v=N7nM0S_IJ6g
记得给Cell加identifier
http://stackoverflow.com/questions/19084274/xcode-unable-to-dequeue-a-cell-with-identifier
http://stackoverflow.com/questions/21579882/ios-show-uiimage-full-screen-with-zooming-pinch-and-double-tap-enabled
UIImageView UIScrolView Demo
https://github.com/evgenyneu/ios-imagescroll
http://beageek.biz/saveload-imagevideos-camera-roll-xcode-ios/
http://pinkstone.co.uk/how-to-record-video-files-in-your-ios-app/
https://github.com/versluis/Video-Recorder
http://stackoverflow.com/questions/11755494/use-of-undeclared-identifier-kuttypemovie
http://stackoverflow.com/questions/20689989/perform-segue-after-login-succesful-in-storyboards/20690072#20690072
http://beageek.biz/saveload-imagevideos-camera-roll-xcode-ios/
http://stackoverflow.com/questions/13793162/setvalueforundefinedkey-this-class-is-not-key-value-coding-compliant-for-the-k
判断是image还是video:
http://stackoverflow.com/questions/17191701/how-to-know-whether-alasset-url-contains-video-or-image
http://stackoverflow.com/questions/20935228/how-to-hide-tab-bar-with-animation-in-ios
http://stackoverflow.com/questions/22996437/release-is-unavailable-not-available-in-automatic-reference-counting-mode
http://stackoverflow.com/questions/8202852/hide-unhide-uinavigationbar-when-the-screen-is-tapped
http://stackoverflow.com/questions/9971835/how-do-i-programatically-add-a-uiimage-to-a-uiimageview-then-add-that-uiimagevie
http://jacopretorius.net/2013/02/playing-video-in-ios.html
http://stackoverflow.com/questions/10126200/avplayer-layer-inside-a-view-does-not-resize-when-uiview-frame-changes
http://www.appcoda.com/uipageviewcontroller-storyboard-tutorial/
http://stackoverflow.com/questions/8227801/done-button-event-mpmovieplayercontroller
http://stackoverflow.com/questions/5787394/find-out-if-mpmovieplayercontroller-is-currently-playing
http://stackoverflow.com/questions/14196012/how-to-force-a-uibutton-to-always-be-on-top
https://developer.apple.com/library/ios/documentation/UIKit/Reference/UIImagePickerControllerDelegate_Protocol/#//apple_ref/doc/constant_group/Editing_Information_Keys
https://www.youtube.com/watch?v=N7nM0S_IJ6g
2015年6月27日星期六
[笔记] UITabBarControllerDelegate
要使用UITabBarControllerDelegate,先来个视频链接(这个视频是iOS7的,如果在iOS8的话,有一些不同。):
(1)MyTabBarControllerDelegate.h文件里,需要加 #import <UIKit/UIKit.h>
(2)想要看Tab Bar Controller Scene的话,需要选择Editor --> Show Document Outline
2015年6月26日星期五
[笔记] CLLocationManager
Demo上传到GitHub了:
https://github.com/1992chenlu/CLLocationManagerDemo
(1)开始以为很好用(但实际上还没有拿来抄的水平)的CLLocationManager的demo:
https://github.com/alienjun/CLLocationManager-iOS8
(2)真正可抄的Map + locationManager的代码(感觉代码很简洁):
http://stackoverflow.com/questions/25848125/ios-8-mkmapview-user-location-request-failure
上面这个链接里的代码唯一的问题是少了一句这个(不加这一句的话,那个叫做didUpdateLocations的回调函数是不会被调用的)
(3)加Marker,抄的下面这个链接Marker部分的代码:
http://www.appcoda.com/ios-programming-101-drop-a-pin-on-map-with-mapkit-api/
另外,关于清空Marker:
(4)用NSTimer实现每隔1秒钟向控制台输出一次当前位置:
NSTimer的资料:
http://stackoverflow.com/questions/6152963/how-to-display-seconds-using-nstimer
初始化一个这样的NSTimer变量:
(5)给一个坐标,用Geocoder的reverseGeocodeLocation把它转换成对应的地址。
https://github.com/1992chenlu/CLLocationManagerDemo
(1)开始以为很好用(但实际上还没有拿来抄的水平)的CLLocationManager的demo:
https://github.com/alienjun/CLLocationManager-iOS8
(2)真正可抄的Map + locationManager的代码(感觉代码很简洁):
http://stackoverflow.com/questions/25848125/ios-8-mkmapview-user-location-request-failure
上面这个链接里的代码唯一的问题是少了一句这个(不加这一句的话,那个叫做didUpdateLocations的回调函数是不会被调用的)
[self.locationManager startUpdatingLocation];(3)加Marker,抄的下面这个链接Marker部分的代码:
http://www.appcoda.com/ios-programming-101-drop-a-pin-on-map-with-mapkit-api/
// Add an annotation
    MKPointAnnotation *point = [[MKPointAnnotation alloc] init];
    point.coordinate = userLocation.coordinate;
    point.title = @"Where am I?";
    point.subtitle = @"I'm here!!!";

    [self.mapView addAnnotation:point];
另外,关于清空Marker:
[mapView removeAnnotations:mapView.annotations];(4)用NSTimer实现每隔1秒钟向控制台输出一次当前位置:
NSTimer的资料:
http://stackoverflow.com/questions/6152963/how-to-display-seconds-using-nstimer
初始化一个这样的NSTimer变量:
_timer = [NSTimer scheduledTimerWithTimeInterval:1 target:self selector:@selector(timerFireMethod:) userInfo:nil repeats:YES];
再写一下这个函数里面:
- (void)timerFireMethod:(NSTimer*)theTimer {
    //remove a second from the display
    NSLog(@"Latitude:%f Longitude:%f", self.locationManager.location.coordinate.latitude, self.locationManager.location.coordinate.longitude);
}
就可以实现一秒钟输出一次当前的坐标了。
(5)给一个坐标,用Geocoder的reverseGeocodeLocation把它转换成对应的地址。
订阅:
博文 (Atom)